So, the script received unexpectedly positive feedback from the community — it seems a fine-tuning guide is in order.
Disclaimer: the script is fully functional, the configs have been refined over years and tested on hundreds of VPS and dedicated servers. The author uses them daily. But a lot depends on your hosting provider, their configs, and other external factors beyond our control. Please test everything before deploying to production!
Information#
What It Does#
Fully automatically configures a VPS or dedicated server from scratch for web server operation.
It installs:
- Nginx
- PHP-FPM versions 7.4 and 8.2 (switchable in the config)
- MariaDB
What’s the Benefit#
- Deploys a universal config that provides excellent automation capabilities (more on this below)
- Your server cannot be hacked through control panel vulnerabilities if you don’t have a control panel
- Does not clutter the system — doesn’t pull unnecessary packages or other junk
- Provides the ability to fine-tune everything, including very tricky internal server forwards and redirects
What Is the Universal Config?#
It is a web server config that AUTOMATICALLY determines which domain a request came to and redirects it to the correct directory. All you need to do is create a folder in /var/www/ with the domain name (e.g., /var/www/google.com), upload your files there, and it will work automatically! Without any additional steps or clicks.
Basic Usage#
IMPORTANT! The script works 100% correctly on Rocky 9, with a 99.99% chance of working correctly on CentOS 9. Use of Rocky 8 or CentOS 8 is not recommended but acceptable.
CLEAN SERVER ONLY! NO LAMP stacks or other bundles. BARE OS ONLY! Request a clean OS from your hosting provider!
curl -s https://repo.privateflare.com/webhostscript/webhostscript.bash | bash…and in a couple of minutes your server will be ready. You can connect via SFTP using FileZilla, WinSCP, Transmit and upload your landing pages, sites, and more.
To verify it’s working, you can point any domain to the server’s IP and open it. First, create an info file:
echo "<? phpinfo();" > /var/www/noroot/index.phpDon’t forget to delete it after testing!
rm -f /var/www/noroot/index.phpAdvanced Usage#
All operations are performed via SFTP using FileZilla (Win), WinSCP (Win, recommended), Transmit (macOS).
Using Individual Domain Configs#
This can be useful when you want to host, alongside regular white-hat sites, landing pages, or other simple sites, something like a WordPress blog on your server.
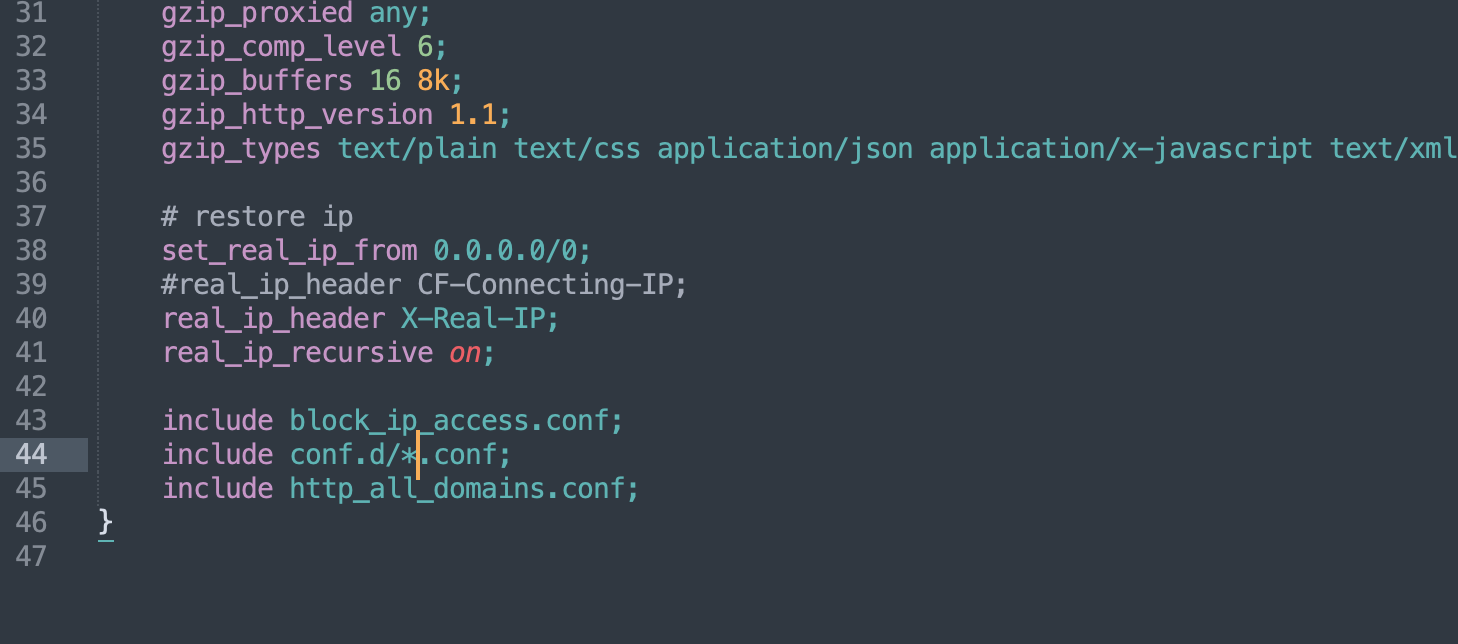
In that case, first edit the main Nginx config. It is located in the /etc/nginx directory. Edit it:
Before:

Add the line include conf.d/*.conf;. After:
And reload the config via console:
nginx -t && nginx -s reloadNext, copy the needed config from the template. Copy from host_nossl.conf_ (in this example we use a config without SSL certificates and HTTPS) to google.com.conf.
Open the new file google.com.conf and first do a find-and-replace of VHOST with your domain (google.com). Then modify to your liking. For example, for WordPress it would look like this:
server {
    listen 80;
    server_name google.com; # <-- changed

    #access_log off;
    error_log /var/log/nginx/error.log;
    access_log /var/log/nginx/access.log main;

    root /var/www/google.com; # <-- changed
    index index.php index.html;

    location ~ /.well-known {
        root /var/www/noroot;
    }

    location / {
        try_files $uri $uri/ /index.php?$args; # <-- changed
    }

    location ~ \.php$ {
        index index.php;
        include php82.conf; # <-- changed
    }
}
Save and reload the configs:
nginx -t && nginx -s reloadAt this point your blog should be working.
Using SSL (TLS) Certificates#
This can be useful if you want to use hosting directly, without PrivateFlare or Cloudflare.
Generate a certificate.
IMPORTANT! Let’s Encrypt sometimes doesn’t issue certificates on the first try due to maintenance, incomplete NS record propagation, or other reasons. We are not affiliated with the organization and cannot influence its operation. In case of issues, check your A records and try again later.
# in this example google.com is your domain, replace it with yours
# user@gmail.com is your email, also replace with yours
certbot certonly -d google.com -n --email user@gmail.com --agree-tos --webroot -w /var/www/noroot
If the certificate was generated successfully, you will see a message like this:
Congratulations! Your certificate and chain have been saved at:
   /etc/letsencrypt/live/api.param.me/fullchain.pem
   Your key file has been saved at:
   /etc/letsencrypt/live/api.param.me/privkey.pem
   Your cert will expire on 2019-06-27. To obtain a new or tweaked
   version of this certificate in the future, simply run certbot again
   with the "certonly" option. To non-interactively renew *all* of
   your certificates, run "certbot renew"
Next, do the same thing but use the host_ssl.conf_ template. The final config will look like this:
server {
    listen 80;
    server_name google.com; # <-- changed

    #access_log off;
    error_log /var/log/nginx/error.log;
    access_log /var/log/nginx/access.log main;

    location ~ /.well-known {
        root /var/www/noroot;
    }

    location / {
        # try_files $uri $uri/ /index.php?$args;
        return 301 https://$host$request_uri;
    }
}

server {
    listen 443 ssl;
    http2 on;
    server_name google.com; # <-- changed

    client_max_body_size 32m;

    root /var/www/google.com;
    index index.php index.html;

    ssl_certificate     /etc/letsencrypt/live/google.com/fullchain.pem; # <-- changed
    ssl_certificate_key /etc/letsencrypt/live/google.com/privkey.pem; # <-- changed
    ssl_protocols       TLSv1 TLSv1.1 TLSv1.2;
    ssl_ciphers         HIGH:!aNULL:!MD5;
    ssl_session_cache shared:SSL:10m;
    ssl_session_timeout 10m;
    ssl_stapling on;
    ssl_stapling_verify on;

    error_log /var/log/nginx/error.log;
    access_log /var/log/nginx/access.log main;

    location / {
        try_files $uri $uri/ /index.php?$args; # <-- changed
    }

    location ~ \.php$ {
        index index.php;
        include php82.conf;
    }
}
Create a cron task for certificate renewal.
Type the following command in the console:
export EDITOR=nano && crontab -eand add this line:
0 0 1 * * /usr/bin/certbot renew --post-hook "systemctl reload nginx" > /var/log/renewals.logPress Control+x, confirm saving by pressing y, and the task is created.
That’s it, basically. It’s not complicated and anyone can do this for themselves to sleep soundly!